Crochet plant hanger: an easy pattern with a solid base
A beginner crochet plant hanger with a solid single crochet cup, six cords and a diamond cradle, plus how to hang it safely and gift it with a plant.
Quick answer
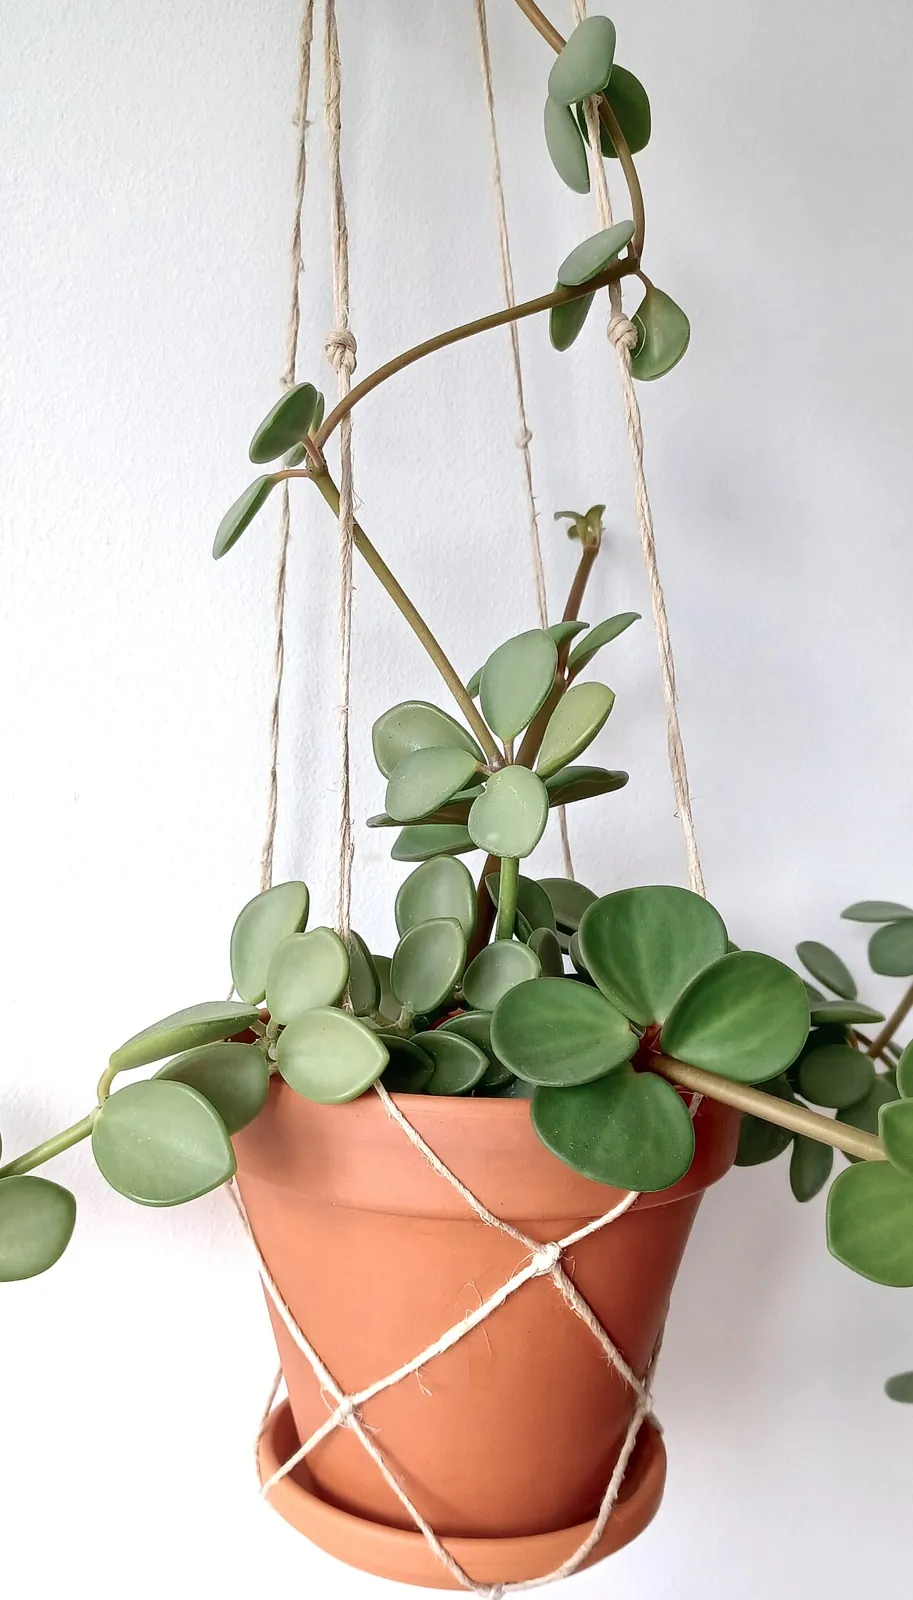
This plant hanger is a single crochet cup that grows from 6 to 48 stitches, with six crocheted cords about 24 in (61 cm) long. You tack the cords together in a diamond pattern around the pot and wrap them together at a ring. In worsted-weight cotton on a 5 mm (US H-8) hook, it holds a light pot with a bottom about 4 in (10 cm) across, typically a 5 to 6 in nursery or plastic pot. It takes an evening or two and makes a lovely gift paired with an easy-care plant.
- Time 3 – 5 hours
- Difficulty Beginner (chain, slip stitch, single crochet)
- Cost About $10 – $20 including a ring
- Makes One hanger, about 20 in (50 cm) from ring to base
Macrame hangers are everywhere, but a crochet version is just as easy to make if you already know single crochet. You also get a solid base cup, so the pot sits in fabric instead of balancing on knots. Paired with a trailing plant, it suits a gardener, a new renter or anyone short on windowsill space.
Terms, yarn and hardware
US terms are used throughout. UK readers: US single crochet (sc) is UK double crochet (dc). Chain (ch) and slip stitch (sl st, UK ss) are the same. Other abbreviations: st = stitch, rnd = round, BLO = back loop only, sc2 in next = two single crochet in the same stitch.
- Worsted-weight 100% cotton (Craft Yarn Council category 4, aran in the UK): about 100 to 150 yd (90 to 140 m), estimated. Two 95 to 120 yd balls leave enough for the wrap and a tassel.
- A 5 mm (US H-8) crochet hook
- Stitch marker
- Tapestry needle
- Scissors
- Tape measure
- A wooden or metal ring, 1½ to 2 in (4 to 5 cm)
- The pot you plan to use, or one the same size, to fit as you go
- For hanging: a ceiling hook rated for the weight (see safety below)
The Craft Yarn Council's guideline hook range for category 4 is 5.5 to 6.5 mm (US I-9 to K-10½); a 5 mm hook makes a tighter cup that won't sag. For bigger pots, use bulky (category 5) cotton cord with the hook size on its label.
How to crochet the hanger
Rounds 1–8: the base
Work in joined rounds. Start each round with ch 1 (not a stitch) and join with a sl st to the first sc.
Rnd 1: Magic ring, ch 1, 6 sc in the ring, pull closed, join. (6)
Rnd 2: 2 sc in each st. (12)
Rnd 3: *sc in next, 2 sc in next* 6 times. (18)
Rnd 4: *sc in next 2, 2 sc in next* 6 times. (24)
Rnd 5: *sc in next 3, 2 sc in next* 6 times. (30)
Rnd 6: *sc in next 4, 2 sc in next* 6 times. (36)
Rnd 7: *sc in next 5, 2 sc in next* 6 times. (42)
Rnd 8: *sc in next 6, 2 sc in next* 6 times. (48)
Each round has 6 repeats, so it gains 6 sts. The base should be about 4 to 4½ in (10 to 11.5 cm) across. Set your pot on it now. If the pot bottom is bigger, add rounds of +6 (round 9 would be *sc in next 7, 2 sc in next*, 54 sts) until it fits. Then adjust the cord spacing in step 3 so the cords stay evenly spaced (54 ÷ 6 = 9 sts per section).Rounds 9–11: turn up the cup
Rnd 9: Ch 1, sc in the back loop only of each st, join. (48) Working in the back loop makes a crisp fold, so the sides turn upward.
Rnds 10–11: Ch 1, sc in each st, join. (48)
You now have a shallow cup about ¾ in (2 cm) deep that the base of the pot sits in.Round 12: crochet six cords
Ch 1. *Sc in next 8 sts, ch 91, sc in the 2nd ch from the hook and in each ch back down to the cup (90 sc)*. Repeat from * 5 more times, then join to the first sc and fasten off. Check: 6 × 8 = 48 cup stitches, and each cord has 90 sc. Each cord should measure about 24 in (61 cm). If yours are shorter, chain more; it's the length that matters, not the count. Number the cords 1 to 6 with markers.
Weave in the ends
Weave the tails into the cup, changing direction once. Don't trim the yarn at the top of any cord. All ends get hidden in the top wrap.
Make the cradle
Put the pot in the cup. Cut six 12 in (30 cm) lengths of yarn. About 2½ in (6 cm) above the cup, tie cord 1 to cord 2, cord 3 to cord 4 and cord 5 to cord 6. Sew through both cords three or four times with the tapestry needle and finish with a square knot. About 2 to 2½ in higher, just under the pot rim, tie cord 2 to 3, 4 to 5 and 6 to 1 the same way. This makes a ring of diamonds that hugs the pot. For a taller pot, add another row of ties. Weave and trim the ends.
Gather at the ring
Take the pot out. Hold the hanger up by the cords and even them out so the cup hangs level. Pass all six cords through the ring and fold them back over about 3 in (7.5 cm). Pin or clip the bundle just below the ring.
Wrap the top
Cut 2 yd (1.8 m) of yarn. Lay a 4 in loop along the bundle, pointing up. Wrap the working end tightly downward over the loop and the bundle 12 to 15 times. Tuck the end through the loop, then pull the top tail until the loop slides up under the wraps and locks. Trim both ends. Then sew a few stitches straight through the wrapped bundle with the tapestry needle to anchor every cord. Trim the folded tails below the wrap to an even fringe, or tuck them in.
Test before gifting
Hang it from a door handle or a sturdy hook, put the pot in and press down on the cup. Check that no cord slips at the wrap and that the cup sits level. If the pot leans, loosen the top wrap and adjust one cord.
Tip: Keep the plant in its plastic nursery pot with drainage holes and slip it into a slightly larger decorative pot without holes. You can lift the inner pot out to water it in the sink, which keeps the cotton dry and stops drips on the floor.
Safety: weight, hooks and water
- Keep it light. This hanger is for light pots. A small plastic or fiber pot is ideal. A heavy glazed ceramic pot full of wet soil is too much for worsted cotton, which will stretch.
- Weigh it wet. Wet soil is heavier than dry, so weigh the potted plant after watering. Choose a hook whose rating meets or exceeds that weight. Bob Vila's guide notes that most hanging plants weigh roughly 7 to 20 lb.
- Use the right fixing. Screw ceiling hooks into a stud, joist or beam. In hollow drywall or plaster, use a toggle bolt. The same guide warns that plastic wall anchors hold only about a third of their wall rating when used in a ceiling.
- Keep it dry. Wet cotton dries slowly and can mildew. Water over the sink and let the pot drain before rehanging. If the hanger gets wet, let it dry fully. Wash according to the yarn label.
- Kids and pets: hang it where small children and pets can't pull on the cords or reach the plant. Some popular trailing plants are toxic to pets. The ASPCA lists golden pothos as toxic to dogs and cats, so check the plant before you gift it to a pet owner.
How to give it
Gift the hanger with a plant already potted inside, or roll it up with the ring on top and tuck it into a pot with a packet of seeds or a cutting in a glass of water. Add a tag with the care instructions and a reminder to use a properly anchored hook. For more ideas, see our gifts for indoor plant lovers, potted plant gifts and air-dry clay planters. For more handmade projects, browse knit and crochet gifts.
Frequently asked questions
What yarn is best for a crochet plant hanger?
A strong cotton with little stretch, in worsted weight for small pots or bulky cotton cord for bigger ones. Avoid soft, stretchy acrylics and fuzzy yarns, which sag and hold dust.
How much weight can a crochet plant hanger hold?
There is no single rating. It depends on the yarn, your stitches and the knots. Treat this design as a hanger for small, light pots, test it before use, and make sure the ceiling hook is rated for the watered weight.
How do I make it fit a bigger pot?
Add base rounds (+6 sts each) until the base matches the pot bottom. Keep the cup stitches evenly divided by six for the cords, use longer cords, and add an extra row of cradle ties.
Sources
- Craft Yarn Council — Standard Yarn Weight System. craftyarncouncil.com
- Craft Yarn Council — Crochet Abbreviations (US and UK terms). craftyarncouncil.com
- Lion Brand Yarn — How to Crochet: Crochet a Circle (joined rounds method). lionbrand.com
- Bob Vila — How to Hang Plants From the Ceiling. bobvila.com
- ASPCA — Toxic and Non-toxic Plants: Golden Pothos. aspca.org
Image credits. Top image: Peperomia boivinii in cultivation by Gemena, CC0 1.0, via Wikimedia Commons · In-article image: Hanging plants on a porch - DPLA - 068a899029db3740ecd8cbbb5bb385a1 by David E. Lucas, Public domain, via Wikimedia Commons
Spotted something out of date or a gift that's no longer available? Tell our editors — we review every correction.