Pressed flower resin gifts: bookmarks, pendants and keepsakes
Pressed flowers set in clear resin make keepsakes that last for years. Here is how to dry and seal the flowers, pour safely and finish bookmarks and pendants.
Quick answer
Dry the flowers until they are paper-crisp, seal them, then set them into a thin first layer of two-part epoxy in a silicone bookmark or pendant mold and top up once they are fixed in place. Measure and cure exactly as your resin's label says, wear nitrile gloves and eye protection in a ventilated room, and finish the pieces with ribbon, a tassel or a chain. Plan on a few weeks for pressing and several days for curing.
- Time 2 to 3 weeks to press flowers (or a few days with silica gel), about 1 hour hands-on, plus the resin's cure time
- Difficulty Moderate
- Cost $35 to $70 for resin, molds, gloves and findings; flowers can be free from the garden
- Makes 3 to 4 bookmarks or 6 to 8 small pendants from a small resin kit
Pressed flowers in clear resin keep a moment that would otherwise wilt in a week: violets from a grandmother's garden, a few stems from a wedding bouquet, the wildflowers from a first hike together. Resin turns them into a bookmark or pendant that gets used every day. The craft rewards patience more than skill: the flowers must be truly dry, the resin measured exactly, and the cure never rushed.
The safety basics match our resin coaster tutorial, and leftover resin makes good resin keychains. This guide focuses on the flowers, which is where most first projects go wrong. For more projects in the same family, browse our clay and resin gifts.
What you need
- Small, flat flowers and leaves: violas, pansies, forget-me-nots, small daisies, ferns, cosmos petals and hydrangea florets all press well
- A flower press, or heavy books and blotting or printer paper; silica gel if you want faster drying
- A clear spray sealer or a little extra resin to seal the flowers
- Two-part epoxy resin suitable for small mold casting (check the label for maximum pour depth)
- Silicone molds: bookmark, round or teardrop pendant, or small tray molds
- Graduated mixing cups, stir sticks, tweezers and a toothpick
- Nitrile gloves (several pairs), safety glasses, an apron and plastic sheeting
- A box or plastic tub to cover the molds while they cure
- Findings: ribbon or tassels for bookmarks; bails, jump rings and chains for pendants; a small hand drill if your molds have no hanging hole
- Fine wet-dry sandpaper and a dust mask for smoothing edges
Resin safety before you start
Uncured epoxy can irritate skin, and repeated unprotected contact can trigger sensitization, an allergic-type reaction that may make you react to resin from then on. Epoxy Europe notes that this risk applies to uncured resin, which is why protection during mixing and pouring matters most.
- Ventilation: work where air circulates. ArtResin, for example, asks for a well-ventilated space and recommends a respirator if ventilation is limited.
- Gloves and eyes: wear nitrile gloves and safety glasses. Change gloves as soon as resin gets on them, and wash any resin off your skin with soap and water rather than solvents.
- Read the label and safety data sheet for your specific product. UV resins and two-part epoxies differ, and the data sheet lists the protective equipment that product needs.
- Children and pets: keep them away from the workspace and the curing molds. This is not a project for young children.
- Sanding: wear a dust mask when you sand cured resin, and wipe the dust away rather than blowing it.
- Not for food: do not make cups or dishes from resin unless the product says it is food-safe when fully cured.
Step-by-step instructions
Press the flowers until completely dry
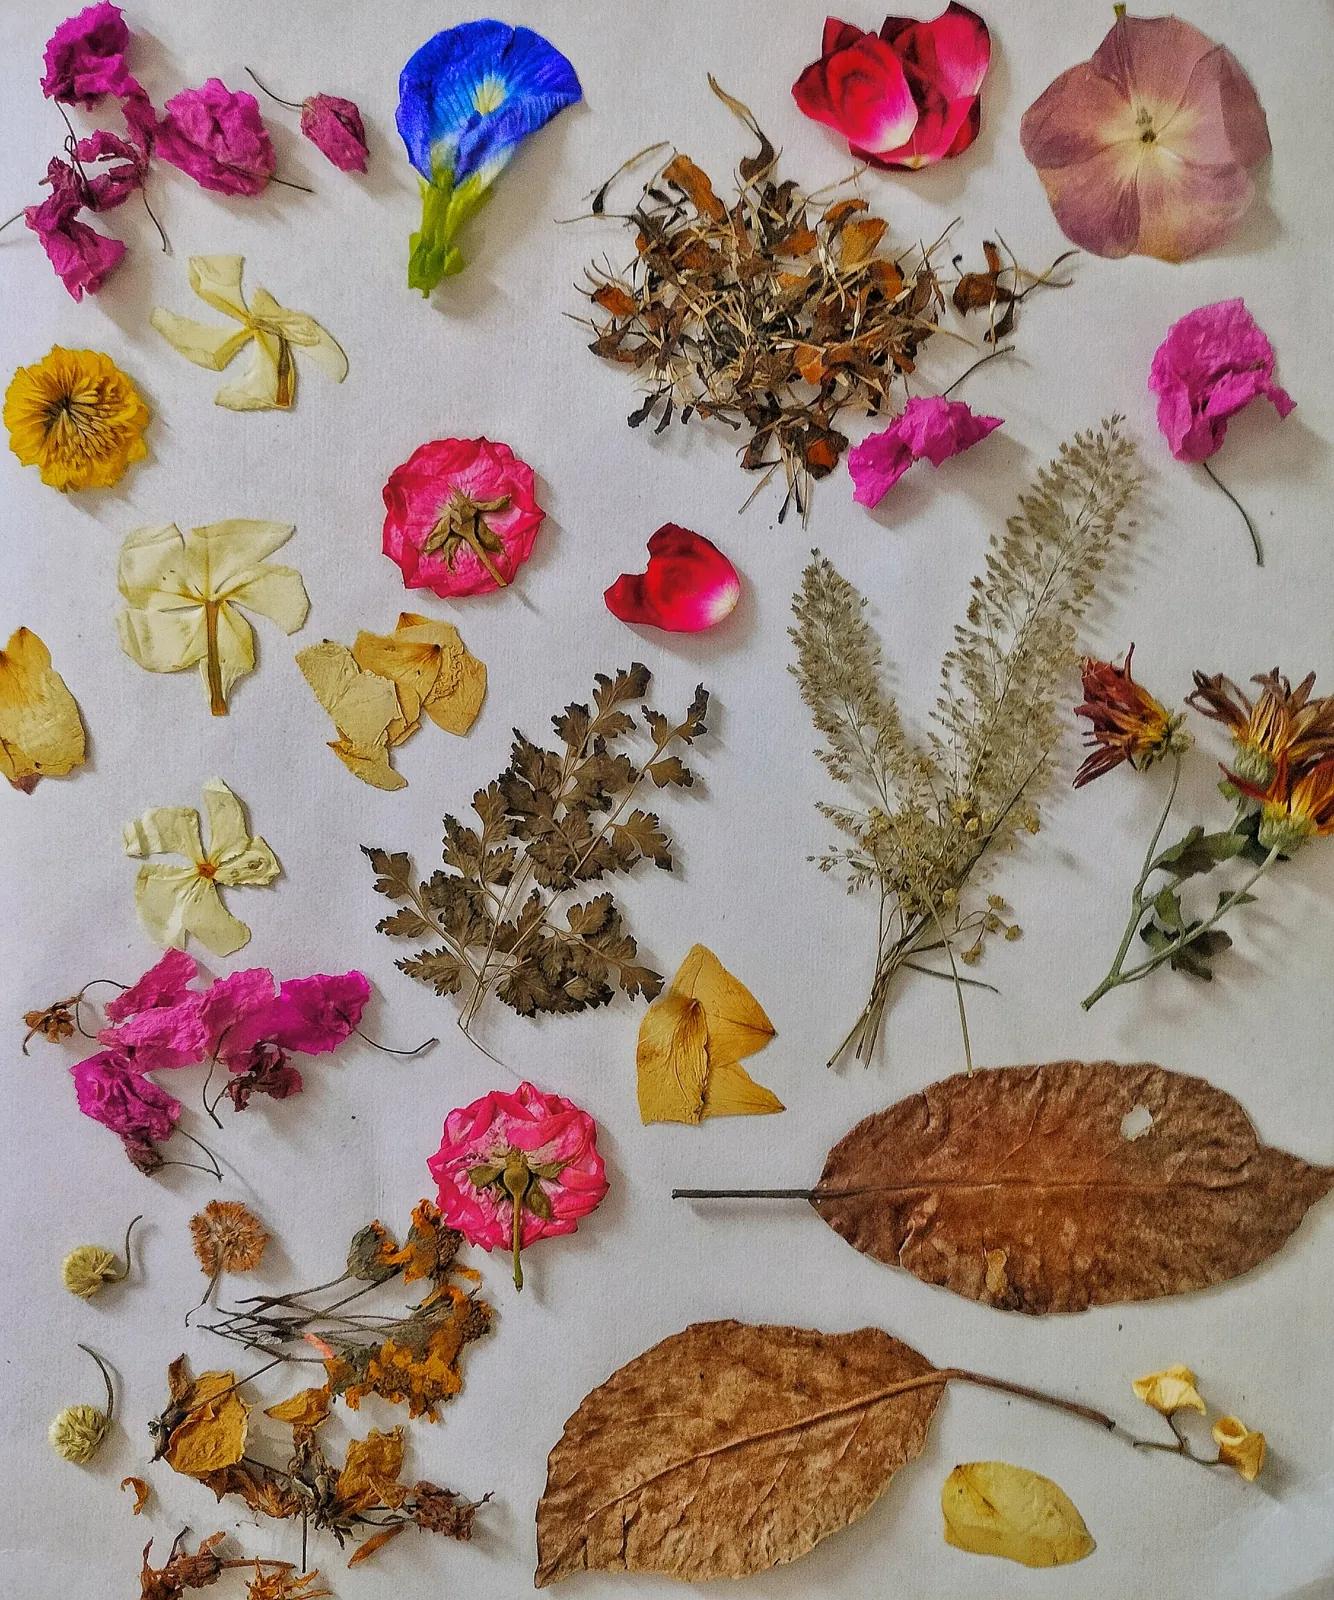
Pick flowers on a dry day, after any dew has gone. Lay them face down between sheets of absorbent paper in a press or inside a heavy book, with more books stacked on top. Nunn Design suggests about two to three weeks for book pressing, or two to five days in silica gel if you want faster drying and better color. A flower is ready when it feels crisp, like paper, with no coolness or softness left in the center. Moisture is the most common cause of bubbles, cloudiness and browning in resin.
Seal the flowers
Even dry petals are porous, and resin soaking into them can turn them translucent or dark. Nunn Design recommends sealing both sides with a fast-drying resin spray, applied outdoors, or brushing on a thin coat of mixed resin. Let the sealer dry completely. Press a few spares, because some flowers change color in resin no matter what, and it helps to test one first.
Plan your layout
Arrange the flowers on paper traced around each mold. Small, flat pieces work best; thick centers trap air. The face of the finished piece is usually the bottom of the mold, so place flowers face down.
Measure and mix the resin
Set up on a level, covered surface in a room within the temperature range on your resin's label. Measure resin and hardener in exactly the ratio stated on your product, by volume or by weight as instructed. Ratios differ by brand; ArtResin, for example, uses equal parts by volume. Stir slowly for the full time on the label, scraping the sides and bottom of the cup, and mix only what you can use within the working time.
Pour a thin first layer and place the flowers
Pour a thin layer into each mold. Dip each flower in a little resin with tweezers so both sides are wet, which pushes out trapped air, then set it into the mold. Craft Resin suggests letting the first layer gel slightly before adding flowers so they stay put instead of floating. Nudge any surfacing bubbles out with a toothpick.
Top up the molds
Once the flowers are fixed in position, mix a fresh batch if needed and fill the molds to just below the rim. An overfilled mold leaves a lip you will have to sand off. Pop any remaining surface bubbles with a toothpick. If your resin maker allows a heat gun, use only brief passes; many resin brands warn against heating deep pours.
Cover and cure undisturbed
Cover the molds with an upturned box to keep dust and hair off, and leave them on the level surface. Do not test them early. Follow the manufacturer's times: ArtResin, for example, states its resin is dry to the touch in about 24 hours and fully cured in 72 hours. Other products, especially thicker casting resins, take longer.
Demold, finish and assemble
Flex the mold and push each piece out from below. Wet-sand any sharp edges while wearing a dust mask. Drill a hanging hole if needed, then thread ribbon or a tassel through bookmarks, or add a bail and jump ring to pendants.
Tip: Pour one extra test piece from the same batch, like a small round charm. If it is still tacky after the label's cure time, so are the others, and you will know before you handle the gifts.
Gift ideas that work well
- Bookmarks: the classic choice for readers and teachers. A thin bookmark mold uses little resin and shows off a long stem or fern.
- Pendants and earrings: a single viola or a few forget-me-nots in a small round mold. Use the recipient's birth month flower; our guide to birth flowers by month lists them.
- Keepsakes from an occasion: petals saved from a wedding, a Mother's Day bouquet or a memorial arrangement. Ask the florist which flowers are in the arrangement, and press them within a day or two while they are still fresh.
- Small catch-all trays: a shallow tray for rings or keys. Check your resin's maximum pour depth before choosing a deeper mold.
Caring for pressed flower resin
Pressed flowers fade over time, and strong sunlight speeds that up. Craft Resin advises keeping finished pieces out of prolonged direct sun, and ArtResin notes that even resin with UV stabilizers should not be deliberately exposed to UV light. Cured resin also softens with heat (ArtResin rates its own to about 120°F, or 50°C), so add a care card: keep out of hot cars and sunny windowsills, and wipe clean with a damp cloth.
How to package it as a gift
Slip a bookmark into a glassine or paper sleeve so the glossy surface does not scratch, or tie it to the front of a paperback with twine. Pendants look best on a small card with two slits for the chain, inside a kraft jewelry box. If the flowers came from somewhere meaningful, write that on the card: "Violets from your garden, May" turns a pretty object into a keepsake. For more presentation ideas, see our gift wrapping guides.
Frequently asked questions
Can I put fresh flowers in resin?
It is not recommended. Moisture in fresh petals causes bubbles, cloudiness and browning, and the flower will keep breaking down inside the resin. Press or dry them first until they are completely crisp.
Why did my flowers turn brown or see-through in resin?
The usual causes are leftover moisture or resin soaking into unsealed petals. Dry them longer, seal both sides before embedding, and test one flower before a full batch. Some varieties change color regardless.
Is UV resin easier than epoxy for flower jewelry?
UV resin cures in minutes under a lamp, which suits small pendants poured in thin layers. It is still a skin sensitizer, needs gloves and ventilation, and has its own instructions for layer thickness and lamp time, so follow the label and safety data sheet.
Sources
- ArtResin — FAQs (ventilation, gloves, ratio, cure time, heat and UV exposure). artresin.com
- Epoxy Europe — Safety (skin sensitization from uncured epoxy). epoxy-europe.eu
- Nunn Design — A beginner's guide to drying and preparing organics for creating resin jewelry. nunndesign.com
- Craft Resin — How to preserve flowers in epoxy resin. craft-resin.com
Image credits. Top image: Pressed Flowers by পাপৰি বৰা, CC BY-SA 4.0, via Wikimedia Commons
Spotted something out of date or a gift that's no longer available? Tell our editors — we review every correction.