How to make a handmade Mother's Day card with pop-up flowers
A step-by-step pop-up bouquet card you can make in an hour, plus four quicker variations, including a handprint card young kids can make.
Quick answer
The easiest handmade card for Mother's Day that still looks special is a pop-up bouquet: two short parallel cuts in a folded inner card make a little step that stands up when the card opens, and a bunch of paper flowers glued to that step does the rest. It takes about an hour, a few sheets of cardstock and a glue stick. Younger kids can make a flat handprint version instead.
- Time 45 – 75 minutes
- Difficulty Easy (adult help with cutting for young kids)
- Cost $5 – $15 in cardstock and glue, less if you have scraps
- Makes One 4.25 x 5.5 in card that fits a standard A2 envelope
A store-bought card says you remembered. A card you made says you sat down and spent an evening thinking about her, which is why so many mothers keep them in a drawer for decades. This tutorial walks through one card in detail, a pop-up flower bouquet, and then gives four quicker handmade Mother's Day card ideas, including an easy version for kids.
For the US, Mother's Day falls on the second Sunday in May (May 9 in 2027). In the UK, Mothering Sunday is the fourth Sunday of Lent, so it moves with Easter (March 7 in 2027). Start a week ahead if you plan to mail the card.
What you need
- 2 sheets of cardstock for the outer and inner cards (US letter size, 65 – 110 lb; one plain, one in a color she likes)
- Scraps of colored paper or cardstock for flowers, leaves and a bow
- A pencil, ruler and eraser
- Scissors (child-safe scissors for kids); a craft knife and cutting mat are optional and for adults only
- A glue stick, plus a little liquid craft glue or double-sided tape for small pieces
- A bone folder or the back of a butter knife for crisp creases
- Markers or gel pens for the message
- An A2 envelope (4 3/8 x 5 3/4 in)
How to make a handmade card for Mother's Day
Cut the two card bases
Cut the outer card to 8.5 x 5.5 in (half a letter sheet) and fold it in half so it measures 4.25 x 5.5 in. Cut the inner card slightly smaller, about 8 x 5.25 in, and fold it the same way. The inner card carries the pop-up, so the outer card stays clean and uncut. Run a bone folder along both folds; sharp creases are what make a pop-up work.
Mark and cut the pop-up step
Keep the inner card folded. Find the middle of the fold and draw two parallel lines straight in from the folded edge, each about 1 inch long and about 1.5 inches apart. Cut along both lines through both layers. The two cuts must be the same length, or the step will twist.
Fold and pop the step
Fold the strip between the cuts forward and back along the line joining the ends of the cuts, creasing it firmly. Open the card halfway and push the strip through to the inside with a fingertip, then close the card and press. When you open it again, a small box-shaped step should stand up in the middle.
Make the bouquet
Cut five to seven simple flowers from scraps: circles with scalloped edges, five-petal shapes or a few rolled spirals. Layer a small circle of a contrasting color on each center. Cut a handful of leaf shapes and two or three thin green strips for stems. Glue everything onto a piece of cardstock shaped like a bouquet, about 3 in wide and 3 in tall, and add a small paper bow where the stems meet.
Test the fit, then glue the bouquet
Hold the bouquet against the front face of the step and slowly close the card. Nothing should poke out of the top or sides when it is shut; trim the bouquet if it does. Then glue it to the front of the step only, not to the card behind it, so it can fold flat.
Glue the inner card into the outer card
With the pop-up pushed inside, put glue stick on the back of one half of the inner card, away from the step opening, and press it into the outer card, lining up the folds. Repeat for the other half. Keep glue away from the step itself and open and close the card a few times to check it moves freely.
Decorate the front and write the message
Keep the front simple so the pop-up is the surprise: a single paper flower, a strip of patterned paper, or "Happy Mother's Day" in your own handwriting. Write the message inside, on the lower half below the bouquet. Let the glue dry for about an hour before putting the card in its envelope.
Tip: Make a practice inner card from printer paper first. It takes five minutes and shows you exactly how big the bouquet can be before you cut into your good cardstock.
If the step will not stand up, the paper is usually too thin or the creases too soft; thicker cardstock and firm folds fix most problems.
Easy handmade Mother's Day card ideas and variations
Easy Mother's Day card for kids: handprint bouquet
This is the version for preschool and early-elementary kids. Fold a sheet of cardstock in half, then have the child press a hand in washable paint onto green paper, or simply trace around their hand with a pencil. Cut out the handprint (child-safe scissors, with an adult trimming tricky gaps between fingers) and glue it to the front so the fingers become stems. Kids then glue on paper circles or tissue-paper balls as flowers and add their name and age inside. Glue sticks are easier and less messy for small hands than liquid glue. For more ideas in this style, see our handprint craft gifts.
Layered paper tulip card
Cut three tulip shapes in graduated sizes from shades of pink or red, stack them with a little foam tape between the layers, and mount them on the front of a plain card with a single green stem. It is flat enough to mail and takes about 30 minutes.
Pocket card with little promises
Glue a paper pocket (an envelope cut in half works) inside the card and tuck in three or four small cards: "breakfast in bed," "I'll do the dishes for a week," "a phone call every Sunday." Older kids and adult children both do well with this one; our coupon book tutorial has wording ideas.
Pressed-flower card
Press a few thin flowers or leaves between sheets of paper inside a heavy book until completely dry and papery. Arrange them on the card front and fix them with small dots of craft glue, or cover them with clear self-adhesive film. Flat flowers such as pansies and ferns press better than thick blooms.
Safety notes for crafting with kids
- Craft knives are for adults only. Always cut on a cutting mat, pull the blade toward an empty area, and retract or cap it as soon as you are done.
- Give young children blunt-tip, child-safe scissors and supervise cutting.
- Use washable, non-toxic paint and glue sticks labeled for children; keep hot glue guns away from small kids.
- Small pieces such as buttons, sequins and googly eyes are choking hazards for toddlers, so leave them off cards made with or for very young children.
Writing, packaging and sending the card
The message is the part she will reread. One specific memory or thank-you beats a long list of compliments: "Thank you for teaching me to drive in the church parking lot" lands harder than "You're the best mom ever." If you are stuck, our card message ideas can get you started.
Slide the card into an A2 envelope with the fold at the bottom so the pop-up is not crushed. If you plan to mail it, remember that layered and pop-up cards are thicker than usual. USPS letter-size mail can be at most 1/4 inch thick, and pieces that are rigid or uneven in thickness may be classed as nonmachinable, which costs extra postage. Have it weighed at the post office, or hand-deliver it with a small gift. Pair it with something else you made from our DIY Mother's Day gifts, or browse the wider Mother's Day section.
Frequently asked questions
What paper is best for a handmade Mother's Day card?
Use cardstock for the card bases, roughly 65 to 110 lb, so the pop-up stands and the card does not flop. Lighter paper is fine for flowers and small decorations.
How can a young child make a Mother's Day card?
A handprint bouquet is the simplest: fold the card for them, let them trace or paint a hand, cut it out together with child-safe scissors and glue on paper flowers with a glue stick. An adult should handle any craft knife.
Why won't my pop-up card stand up?
Usually the cuts are different lengths, the creases are soft, or the paper is too thin. Recut on cardstock with matching cuts and crease firmly in both directions.
Can I mail a pop-up card?
Yes, but it may need extra postage. Letter mail is limited to 1/4 inch thick, and lumpy or rigid cards can be charged as nonmachinable, so have it checked at the post office.
When is Mother's Day in 2027?
In the US it is Sunday, May 9, 2027 (second Sunday in May). UK Mothering Sunday is Sunday, March 7, 2027 (fourth Sunday of Lent).
Sources
- Think Play Create — DIY holiday pop-up card (parallel-cut pop-up method). thinkplaycreate.org
- USPS Postal Explorer — DMM 101, Physical Standards (letter thickness and nonmachinable criteria). pe.usps.com
- Office Holidays — Mother's Day in the USA. officeholidays.com
- Office Holidays — Mothering Sunday in the United Kingdom. officeholidays.com
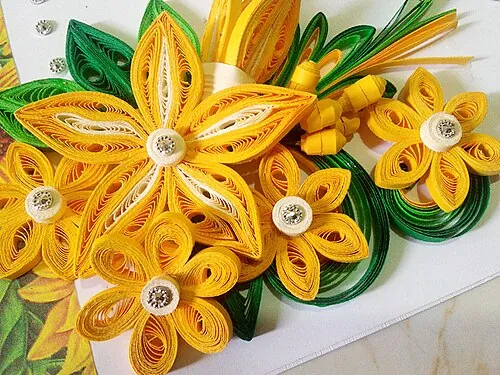
Image credits. Top image: Yellow-theme-Birthday-Card-Side-03 by Lakmi Handcrafts, CC BY-SA 4.0, via Wikimedia Commons
Spotted something out of date or a gift that's no longer available? Tell our editors — we review every correction.